Alright folks, listen up! If you've ever wondered how to draw a snowflake on a nail—yes, you heard me right, a nail—then you're in the right place. This isn't just about painting your nails; it's about unleashing your inner artist and adding a touch of winter magic to your fingertips. Whether you're a seasoned nail artist or a total beginner, this guide will walk you through every step of the process. So, grab your nail polish and let's dive in!
Before we get started, let's talk about why this skill matters. Drawing a snowflake on a nail isn't just a fun activity; it's also a great way to boost your confidence and express your creativity. Imagine walking into a room with these icy designs on your nails. People will be asking, "Who did your nails?" and you can proudly say, "Me!" Now that's something to be proud of, right?
Let me give you a little heads-up: this isn't rocket science, but it does require some patience and practice. Don't worry if your first attempts don't turn out perfect. Even professional nail artists started somewhere, and soon enough, you'll be creating snowflake masterpieces that will leave everyone in awe. So, are you ready to level up your nail game? Let's go!
Read also:Shhh Just Let It Happen A Journey Into Surrendering Lifersquos Flow
Table of Contents
- Why Snowflakes Are the Perfect Nail Art Design
- Tools You'll Need to Draw a Snowflake on a Nail
- Preparing Your Nails for Art
- Step-by-Step Guide: How to Draw a Snowflake on a Nail
- Common Mistakes to Avoid
- Troubleshooting Your Snowflake Designs
- Creative Variations for Your Snowflake Nail Art
- Maintaining Your Snowflake Nail Art
- Finding Inspiration for Your Designs
- Conclusion: Your Winter Wonderland Awaits
Why Snowflakes Are the Perfect Nail Art Design
Alright, let's break it down. Snowflakes are iconic, timeless, and super versatile. They scream winter vibes but can also be adapted to fit any season. Plus, each snowflake is unique, just like you! Whether you're going for a minimalist look or an all-out glam design, snowflake nail art is a great way to express yourself. And the best part? It's not as hard as it looks.
Here’s why snowflakes are a nail artist's best friend:
- They're universally loved and easy to recognize.
- They can be customized in endless ways—different sizes, colors, and patterns.
- They're perfect for holidays like Christmas and New Year's Eve.
- They're beginner-friendly but still look impressive.
Tools You'll Need to Draw a Snowflake on a Nail
Now, before you dive headfirst into this creative journey, let's talk about the tools you'll need. Don't worry, you don't need a fancy kit to get started. Here's a quick rundown:
Must-Have Tools
- Nail polish: Choose a base color and a contrasting color for the snowflake. White and blue are classic choices, but feel free to experiment!
- Detail brush: A fine brush is essential for creating those delicate snowflake lines. You can also use a dotting tool if you prefer.
- Top coat: This will seal your design and make it last longer.
- Clean-up brush: Mistakes happen, and a clean-up brush with nail polish remover will save the day.
See? Not too complicated, right? Now that you've got your tools ready, let's move on to the next step.
Preparing Your Nails for Art
Preparation is key, folks. Just like how you wouldn't paint a masterpiece on a dirty canvas, you shouldn't start your snowflake design on unprepared nails. Here's what you need to do:
Step 1: Clean Your Nails
Start by cleaning your nails with a lint-free wipe. This removes any oils or dirt that might interfere with the polish.
Read also:Cauliflower Thins Costco The Ultimate Guide To A Healthy Snack Revolution
Step 2: Apply Base Color
Choose a base color that complements your snowflake design. Apply two coats for a smooth, even finish. Let it dry completely before moving on.
Step 3: Protect Your Skin
Use tape or a cuticle oil to protect your skin from stray brush strokes. Trust me, it makes clean-up a lot easier.
Once your nails are prepped, you're ready to start drawing your snowflake. Easy peasy, right?
Step-by-Step Guide: How to Draw a Snowflake on a Nail
Alright, here's the moment you've been waiting for! Let's break down the process of drawing a snowflake on a nail step by step. Don't rush—take your time and enjoy the process.
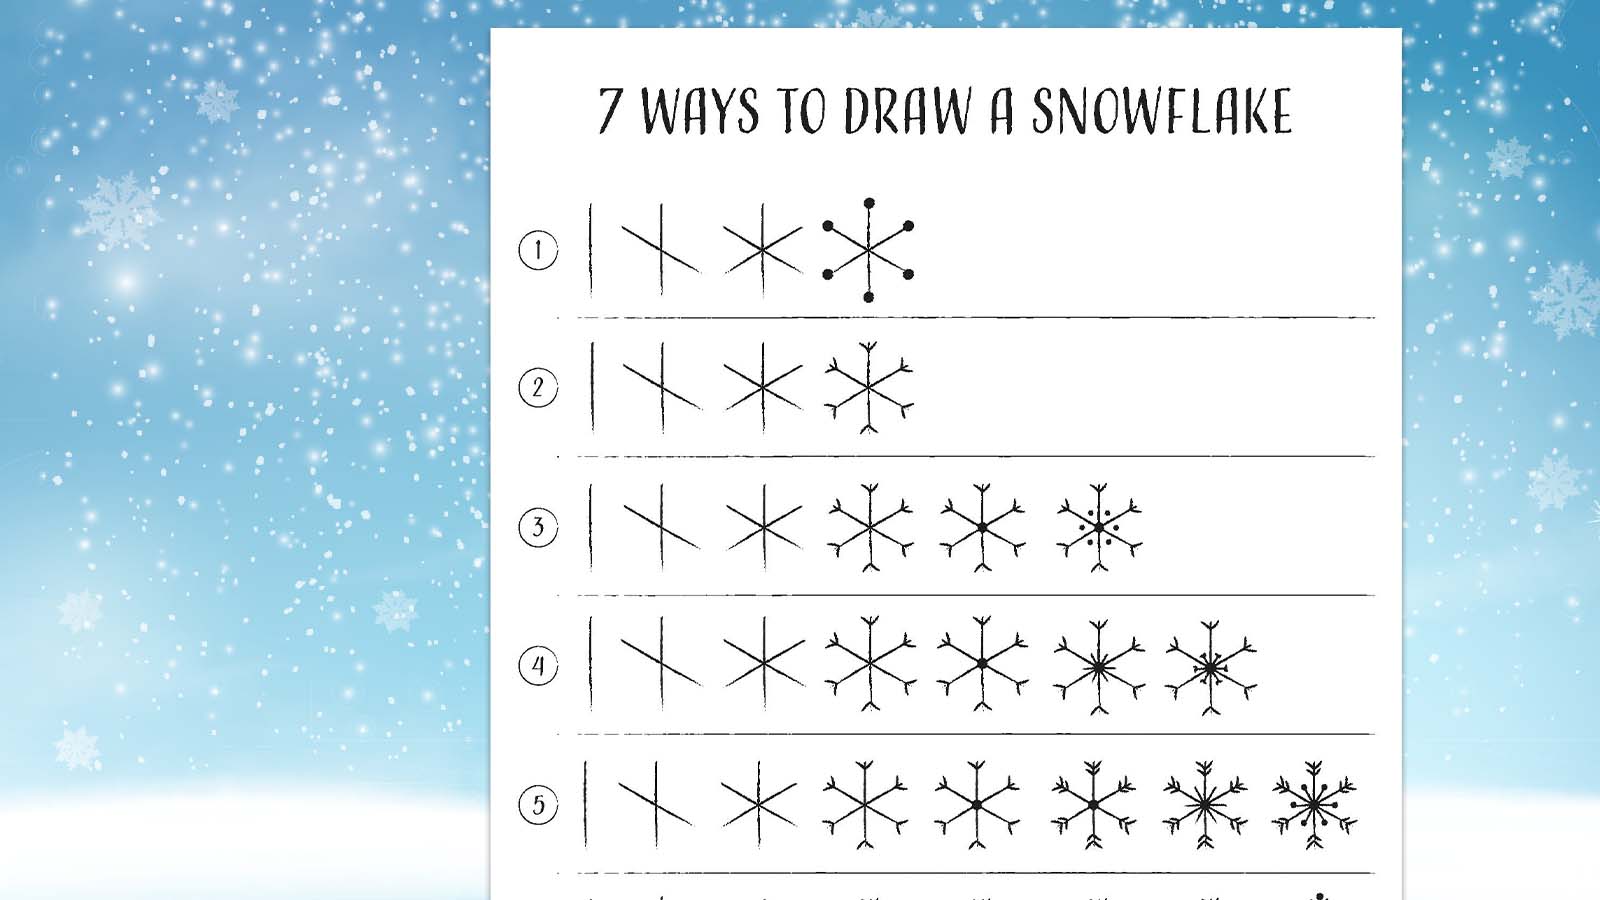
Step 1: Start with a Central Dot
Using your detail brush or dotting tool, create a small dot in the center of your nail. This will serve as the focal point of your snowflake.
Step 2: Add Six Lines
From the central dot, draw six straight lines radiating outward. These will be the arms of your snowflake. Try to keep them evenly spaced for a balanced look.
Step 3: Create Branches
Now it's time to add some details. Draw smaller lines branching off from each arm. You can make them symmetrical or go for a more organic, free-flowing look.
Step 4: Add Patterns
Finally, add some decorative patterns to each arm. This could be dots, dashes, or any other design you like. The possibilities are endless!
And there you have it—your very own snowflake masterpiece. Take a moment to admire your work before sealing it with a top coat.
Common Mistakes to Avoid
Even the best artists make mistakes sometimes, but don't worry—these are easy to fix. Here are some common pitfalls to watch out for:
- Using too much polish: A little goes a long way. Too much polish can lead to smudging and messiness.
- Not letting layers dry: Rushing through the process can cause your design to smudge. Patience is key!
- Ignoring symmetry: While asymmetrical designs can look cool, most people prefer their snowflakes to be balanced.
Remember, practice makes perfect. If something doesn't turn out right, just clean it up and try again.
Troubleshooting Your Snowflake Designs
Let's say you've followed all the steps, but your snowflake still isn't looking quite right. What do you do? Here are a few troubleshooting tips:
Tip 1: Use a Magnifying Glass
If you're struggling to see what you're doing, a magnifying glass can help. It's like having superpowers for your nail art!
Tip 2: Experiment with Brush Sizes
Not all brushes are created equal. If your lines are too thick or too thin, try switching to a different size brush.
Tip 3: Practice on Paper First
Before committing to your nails, practice drawing snowflakes on a piece of paper. This will help you get a feel for the design without the pressure.
With these tips in mind, you'll be troubleshooting like a pro in no time.
Creative Variations for Your Snowflake Nail Art
Now that you've mastered the basics, it's time to get creative. Here are a few ideas to take your snowflake nail art to the next level:
Idea 1: Gradient Snowflakes
Use a sponge to create a gradient effect on your nails, then add snowflakes on top. This adds depth and dimension to your design.
Idea 2: 3D Snowflakes
For a truly stunning look, try using a 3D gel polish to create raised snowflakes. It's a bit more advanced, but the results are worth it.
Idea 3: Snowflake Patterns
Instead of drawing individual snowflakes, create a repeating pattern across all your nails. This works especially well for shorter nails.
These variations will keep your designs fresh and exciting. Who knows? You might even come up with your own unique style!
Maintaining Your Snowflake Nail Art
Once you've created your masterpiece, you'll want to keep it looking great for as long as possible. Here's how:
Tip 1: Apply a Top Coat Regularly
A good top coat will protect your design from chips and smudges. Apply a fresh coat every few days to keep your nails looking fresh.
Tip 2: Avoid Harsh Chemicals
Chemicals like acetone can damage your nail art. If you need to clean up mistakes, use a gentle polish remover instead.
Tip 3: Moisturize Your Cuticles
Keeping your cuticles moisturized will prevent them from peeling and ruining your design.
With a little care, your snowflake nail art can last for days—or even weeks!
Finding Inspiration for Your Designs
Feeling stuck? Inspiration is all around you. Here are a few places to look:
- Pinterest: A treasure trove of nail art ideas, from simple designs to complex masterpieces.
- Instagram: Follow nail artists and influencers for daily inspiration.
- Nature: Take a walk outside and observe the beauty of snowflakes in real life.
Don't be afraid to experiment and make the design your own. After all, creativity is all about having fun!
Conclusion: Your Winter Wonderland Awaits
Well, there you have it—everything you need to know about how to draw a snowflake on a nail. From preparation to maintenance, this guide has covered all the bases. Remember, practice makes perfect, and every mistake is just another opportunity to learn.
So, what are you waiting for? Grab your tools and start creating your own winter wonderland on your nails. And don't forget to share your designs with the world. Who knows? You might just inspire someone else to try their hand at snowflake nail art. Until next time, keep shining and keep creating!